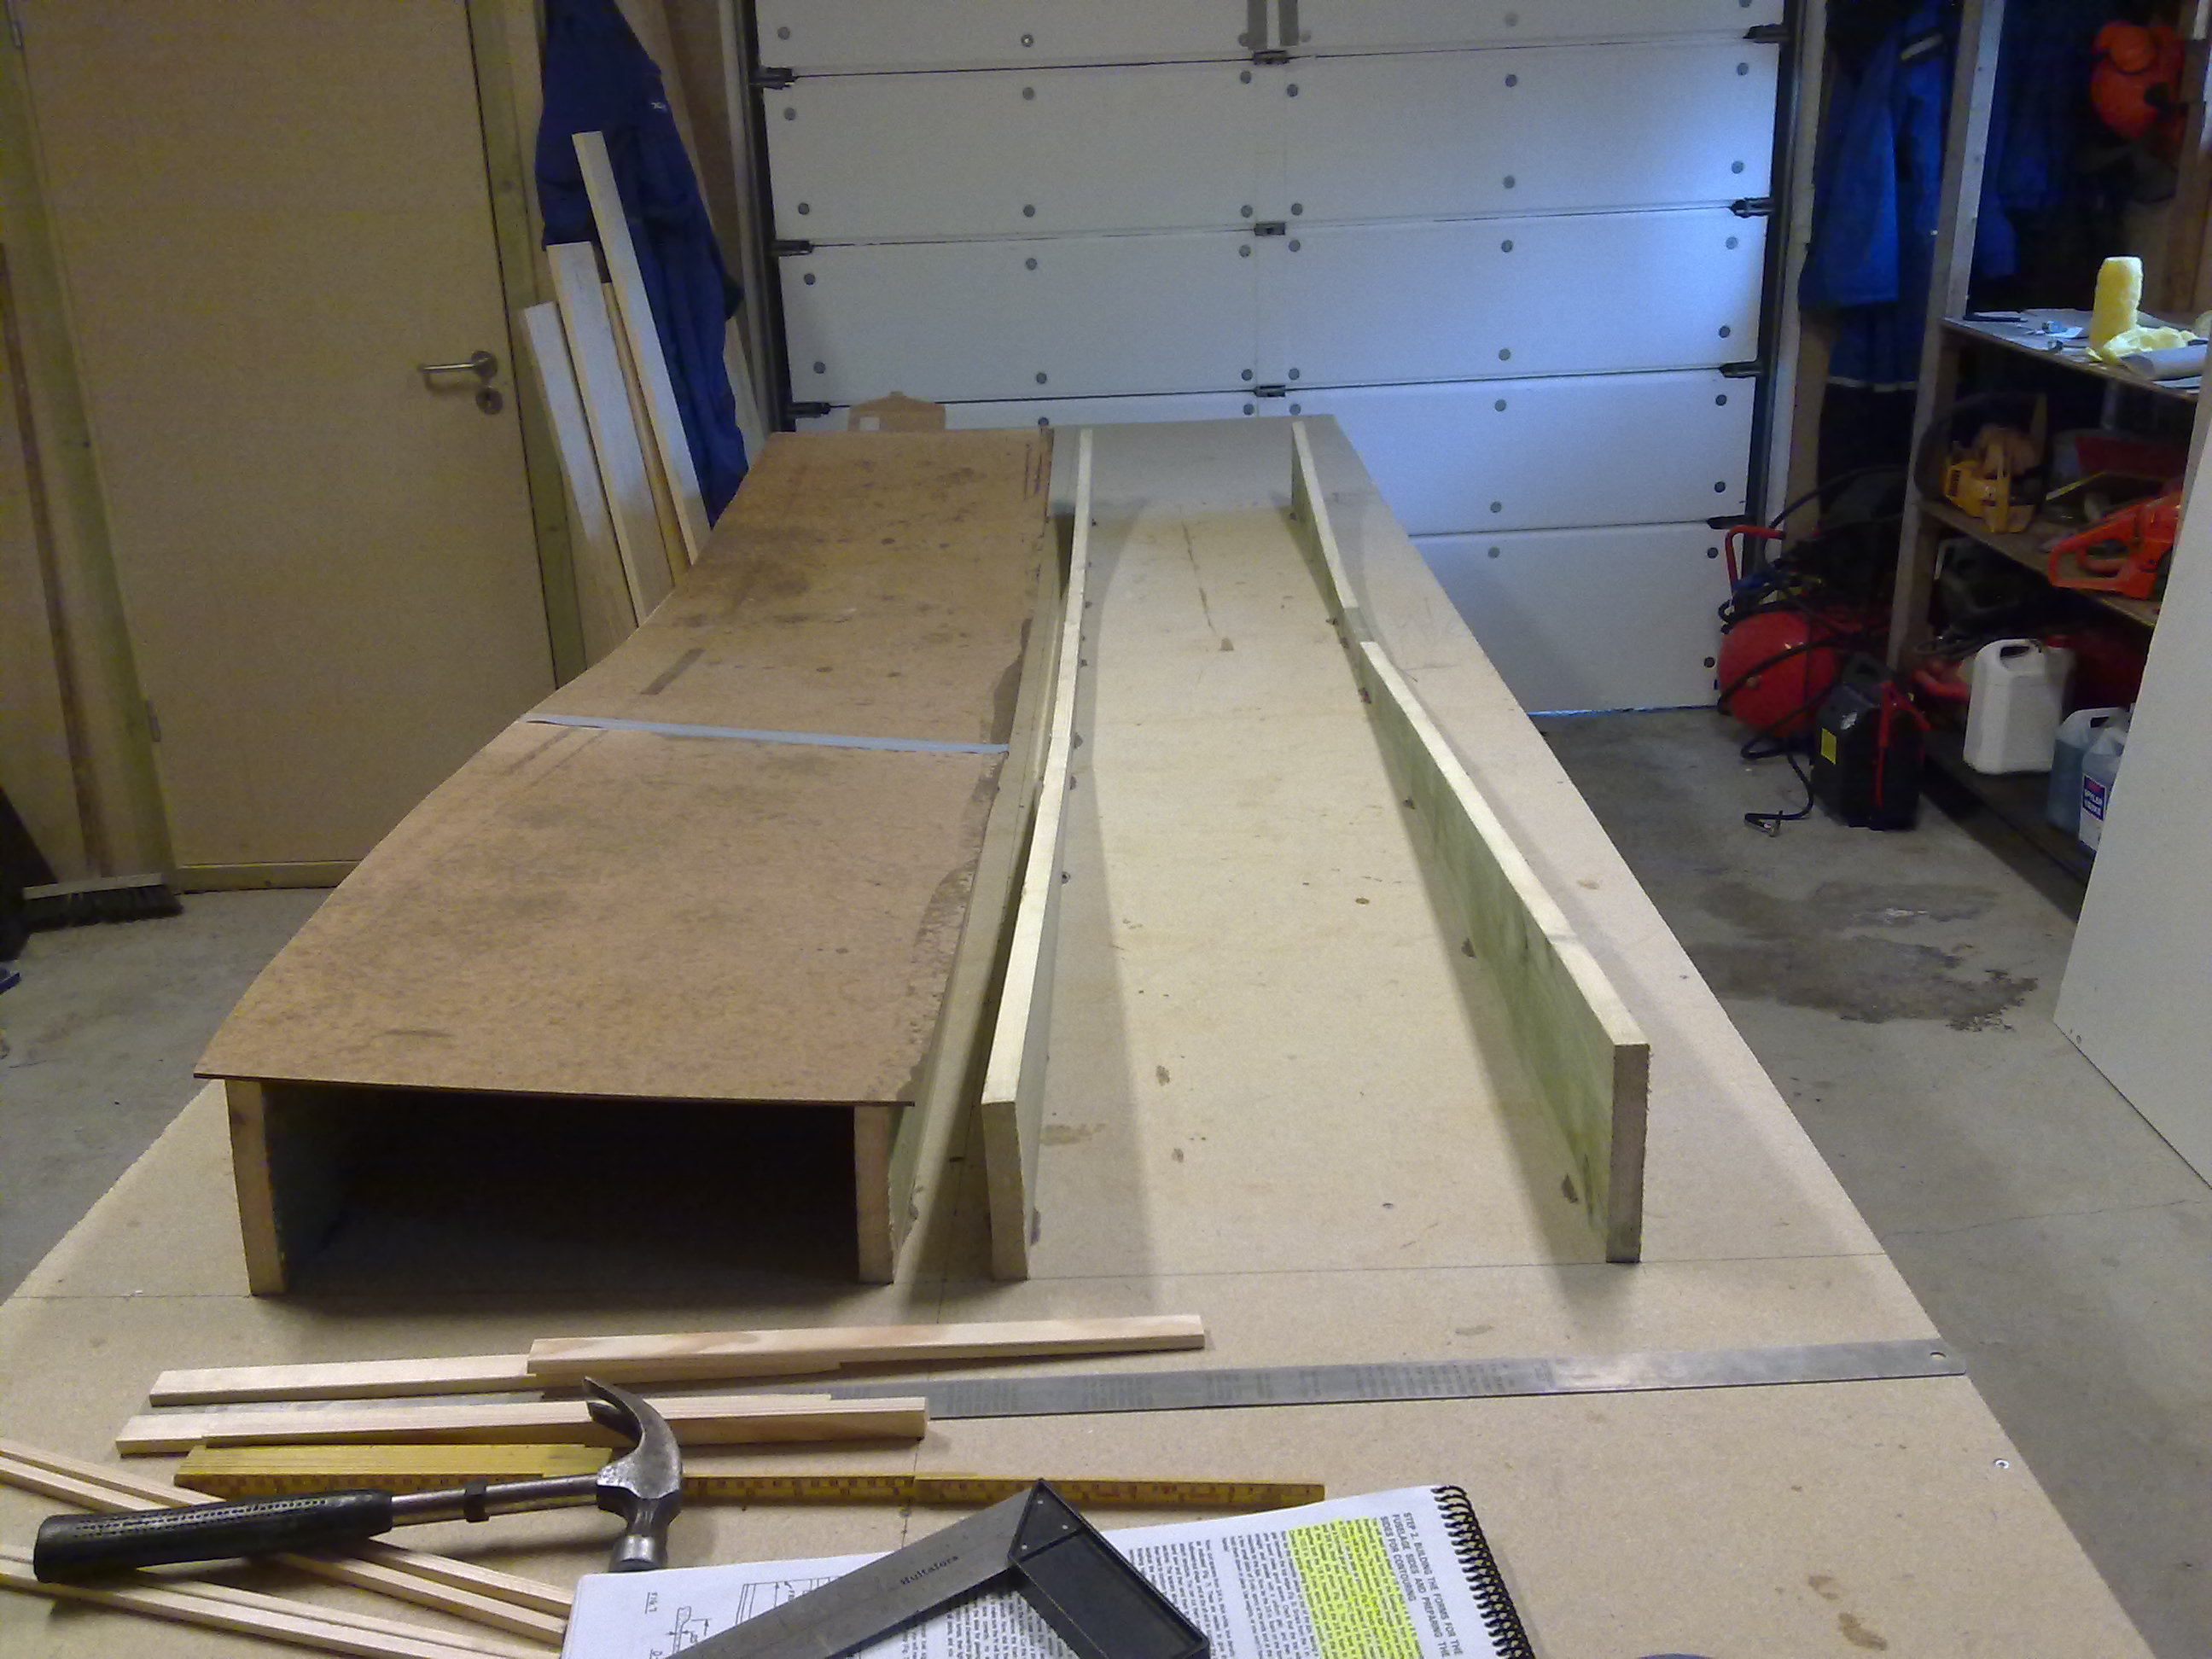
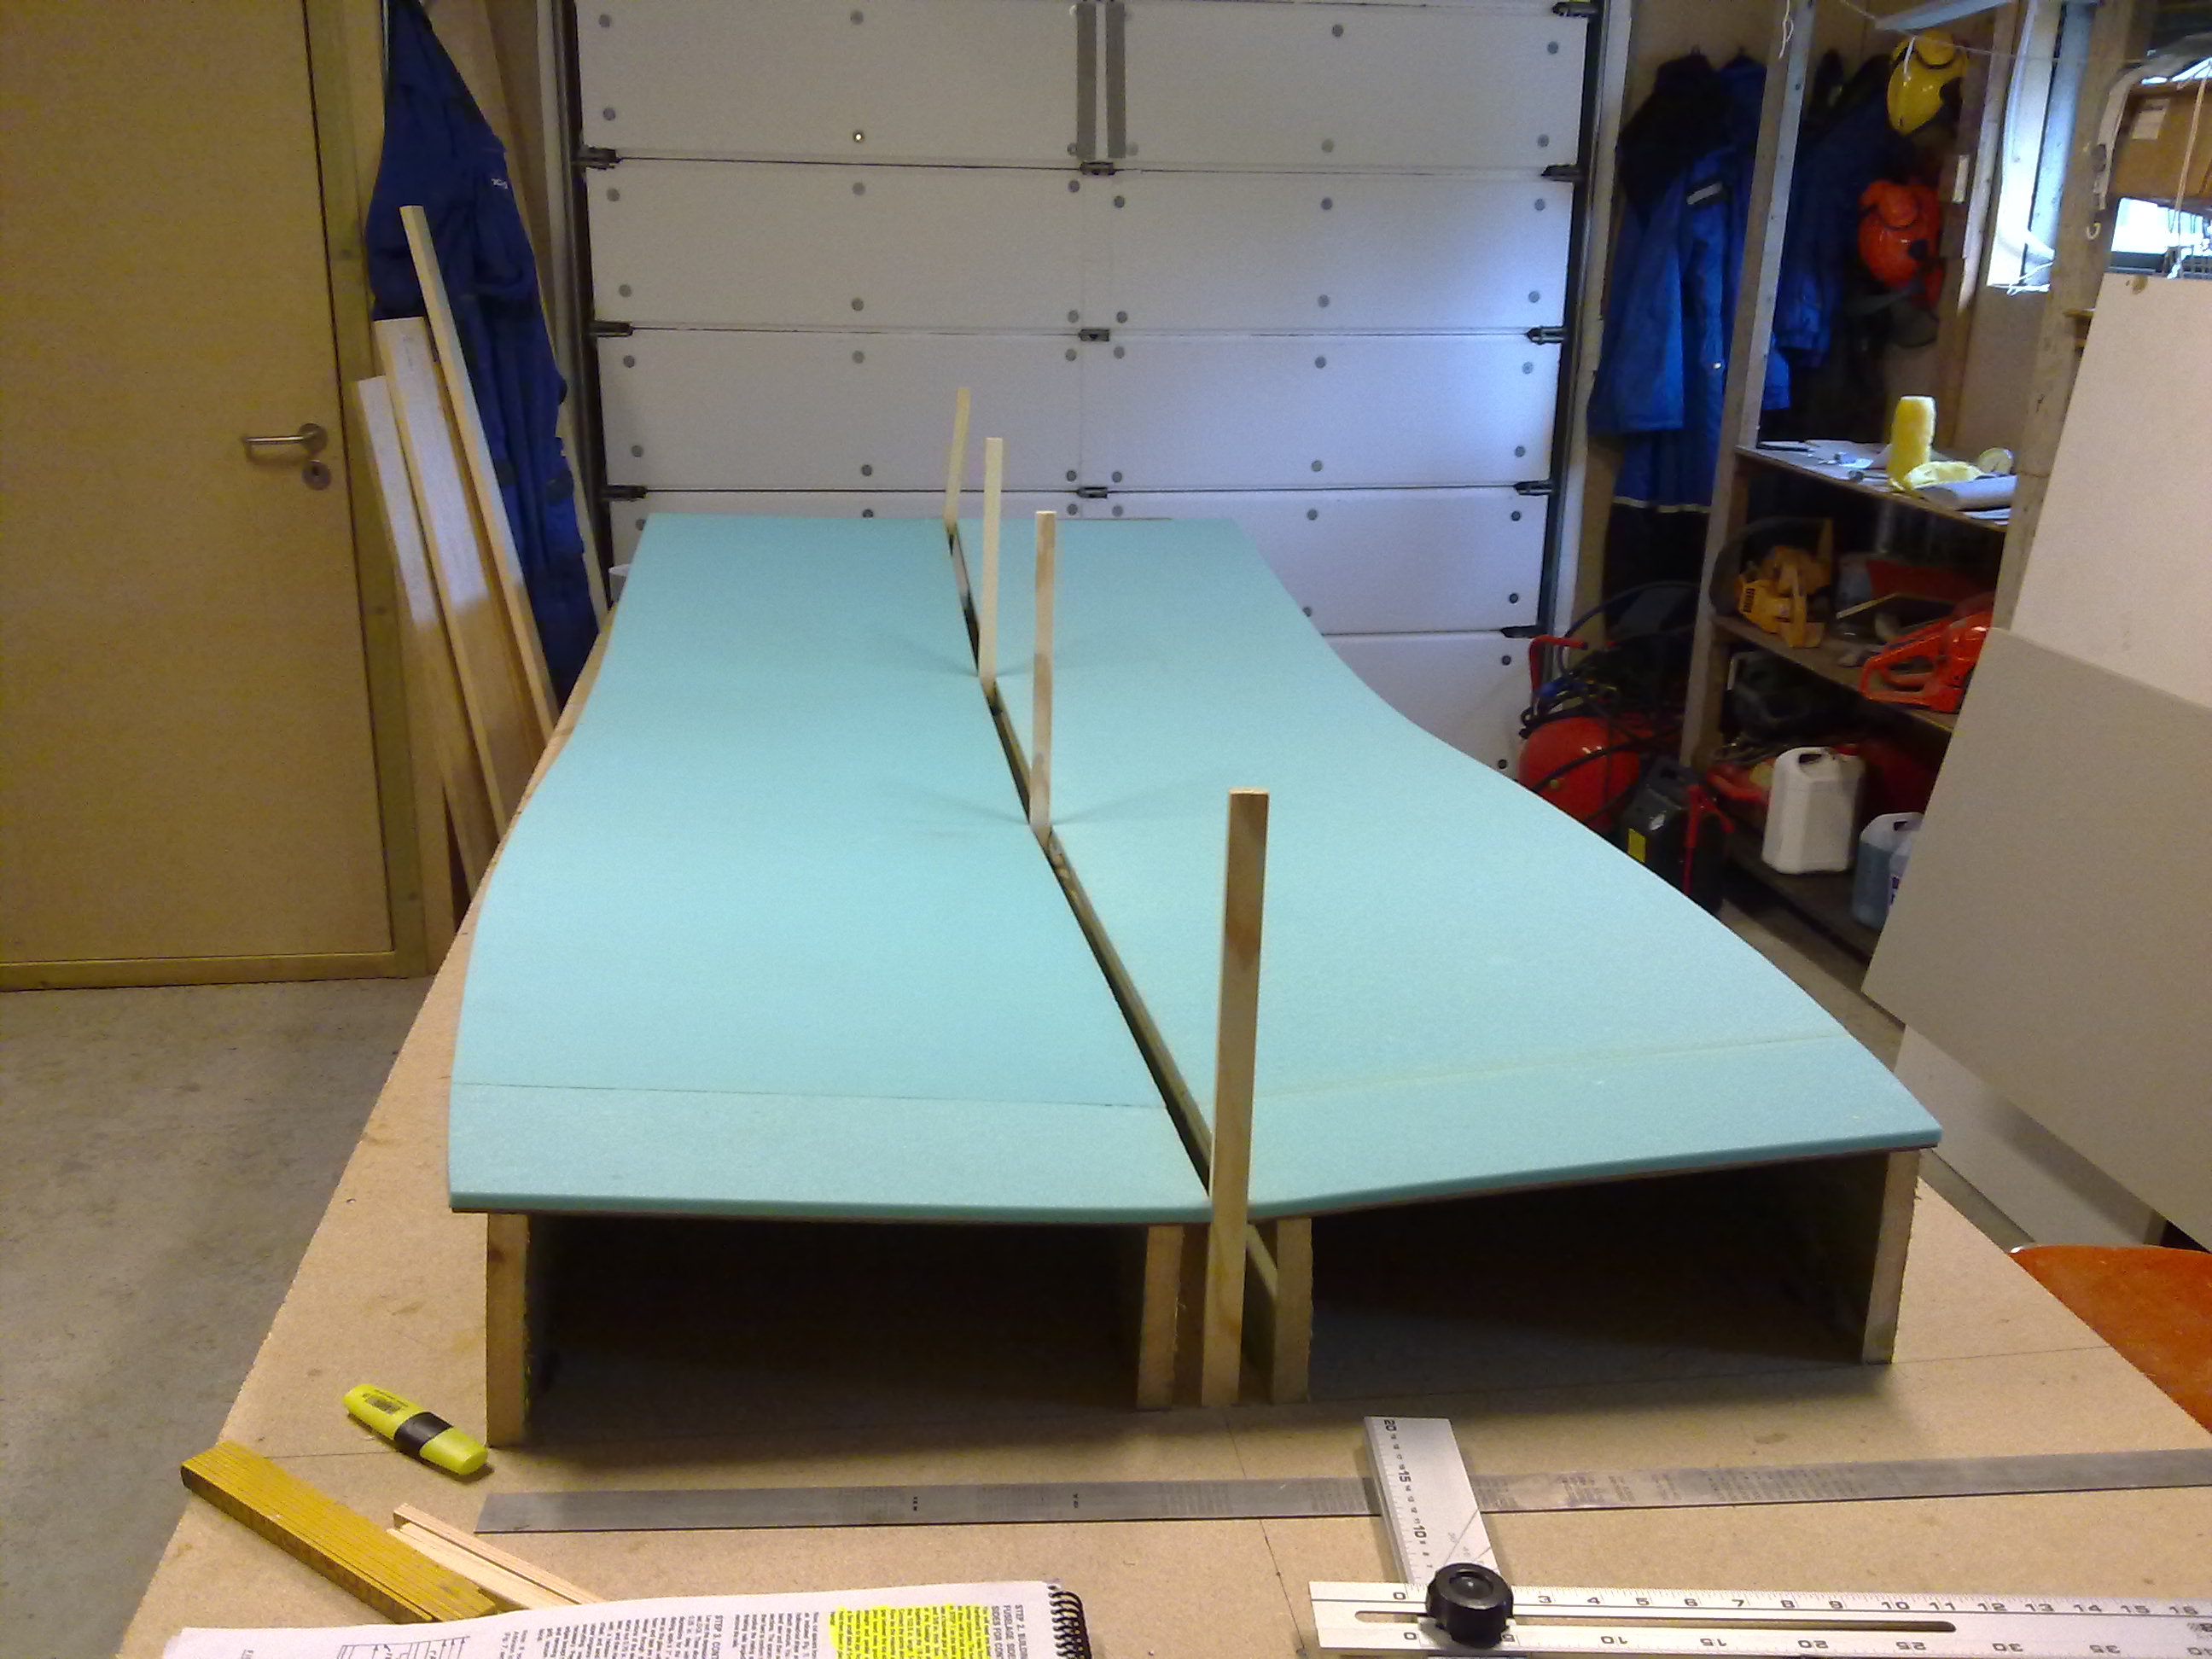
Next thing to do is erecting the jigs to make them support the masonite and the fuselage-foam. I draw lines on my table according to plans, and bondoed the jigs in place. Then I cut some spacers 7/8 inch wide that I placed between the two masonite-sheets to assure I got the correct distance between them. The masonite is nailed to the jigs. Then the foam is placed ontop of the masonite, fastened with some blobs of 5-min epoxy and weighed down for cure. It’s important to be accurate here, to make it easier to assemble the fuselage with the correct angles later on. The clue is to measure, measure and measure again.