
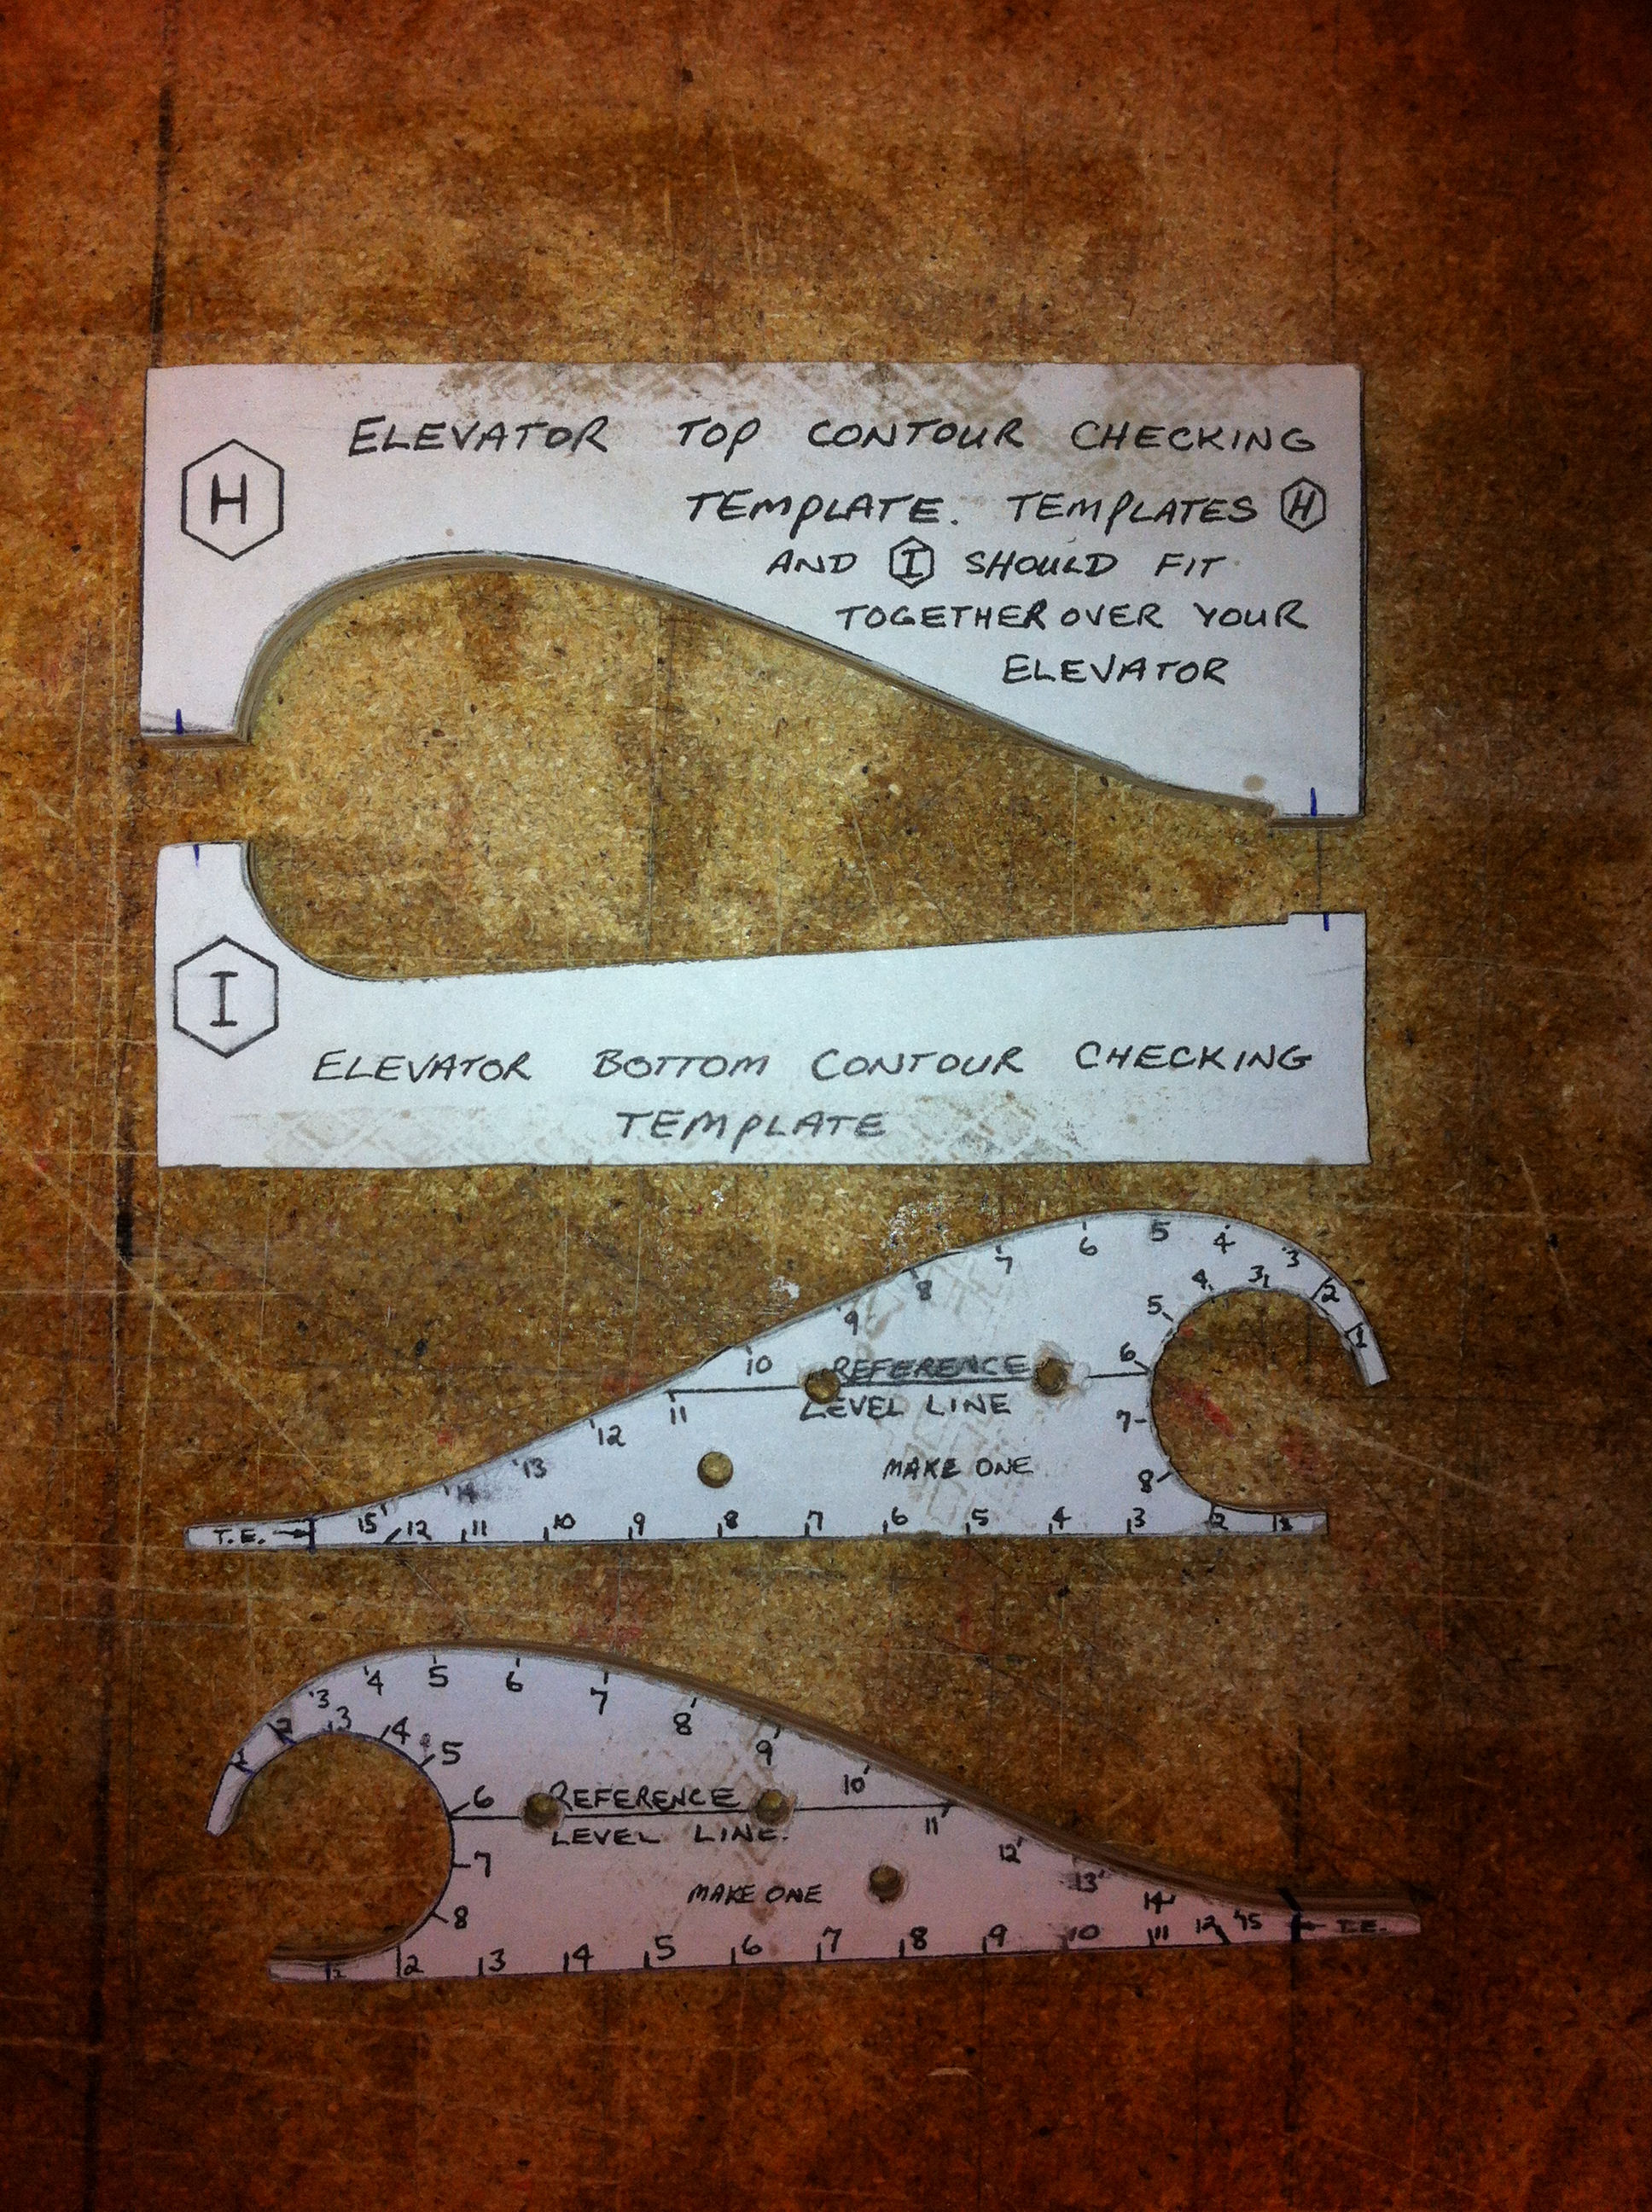
2012-08-01: I cut the templates of 6mm plywood as I did with the canard-templates. I have sanded them very smooth to assure that the hotwire will glide over them without any snag.
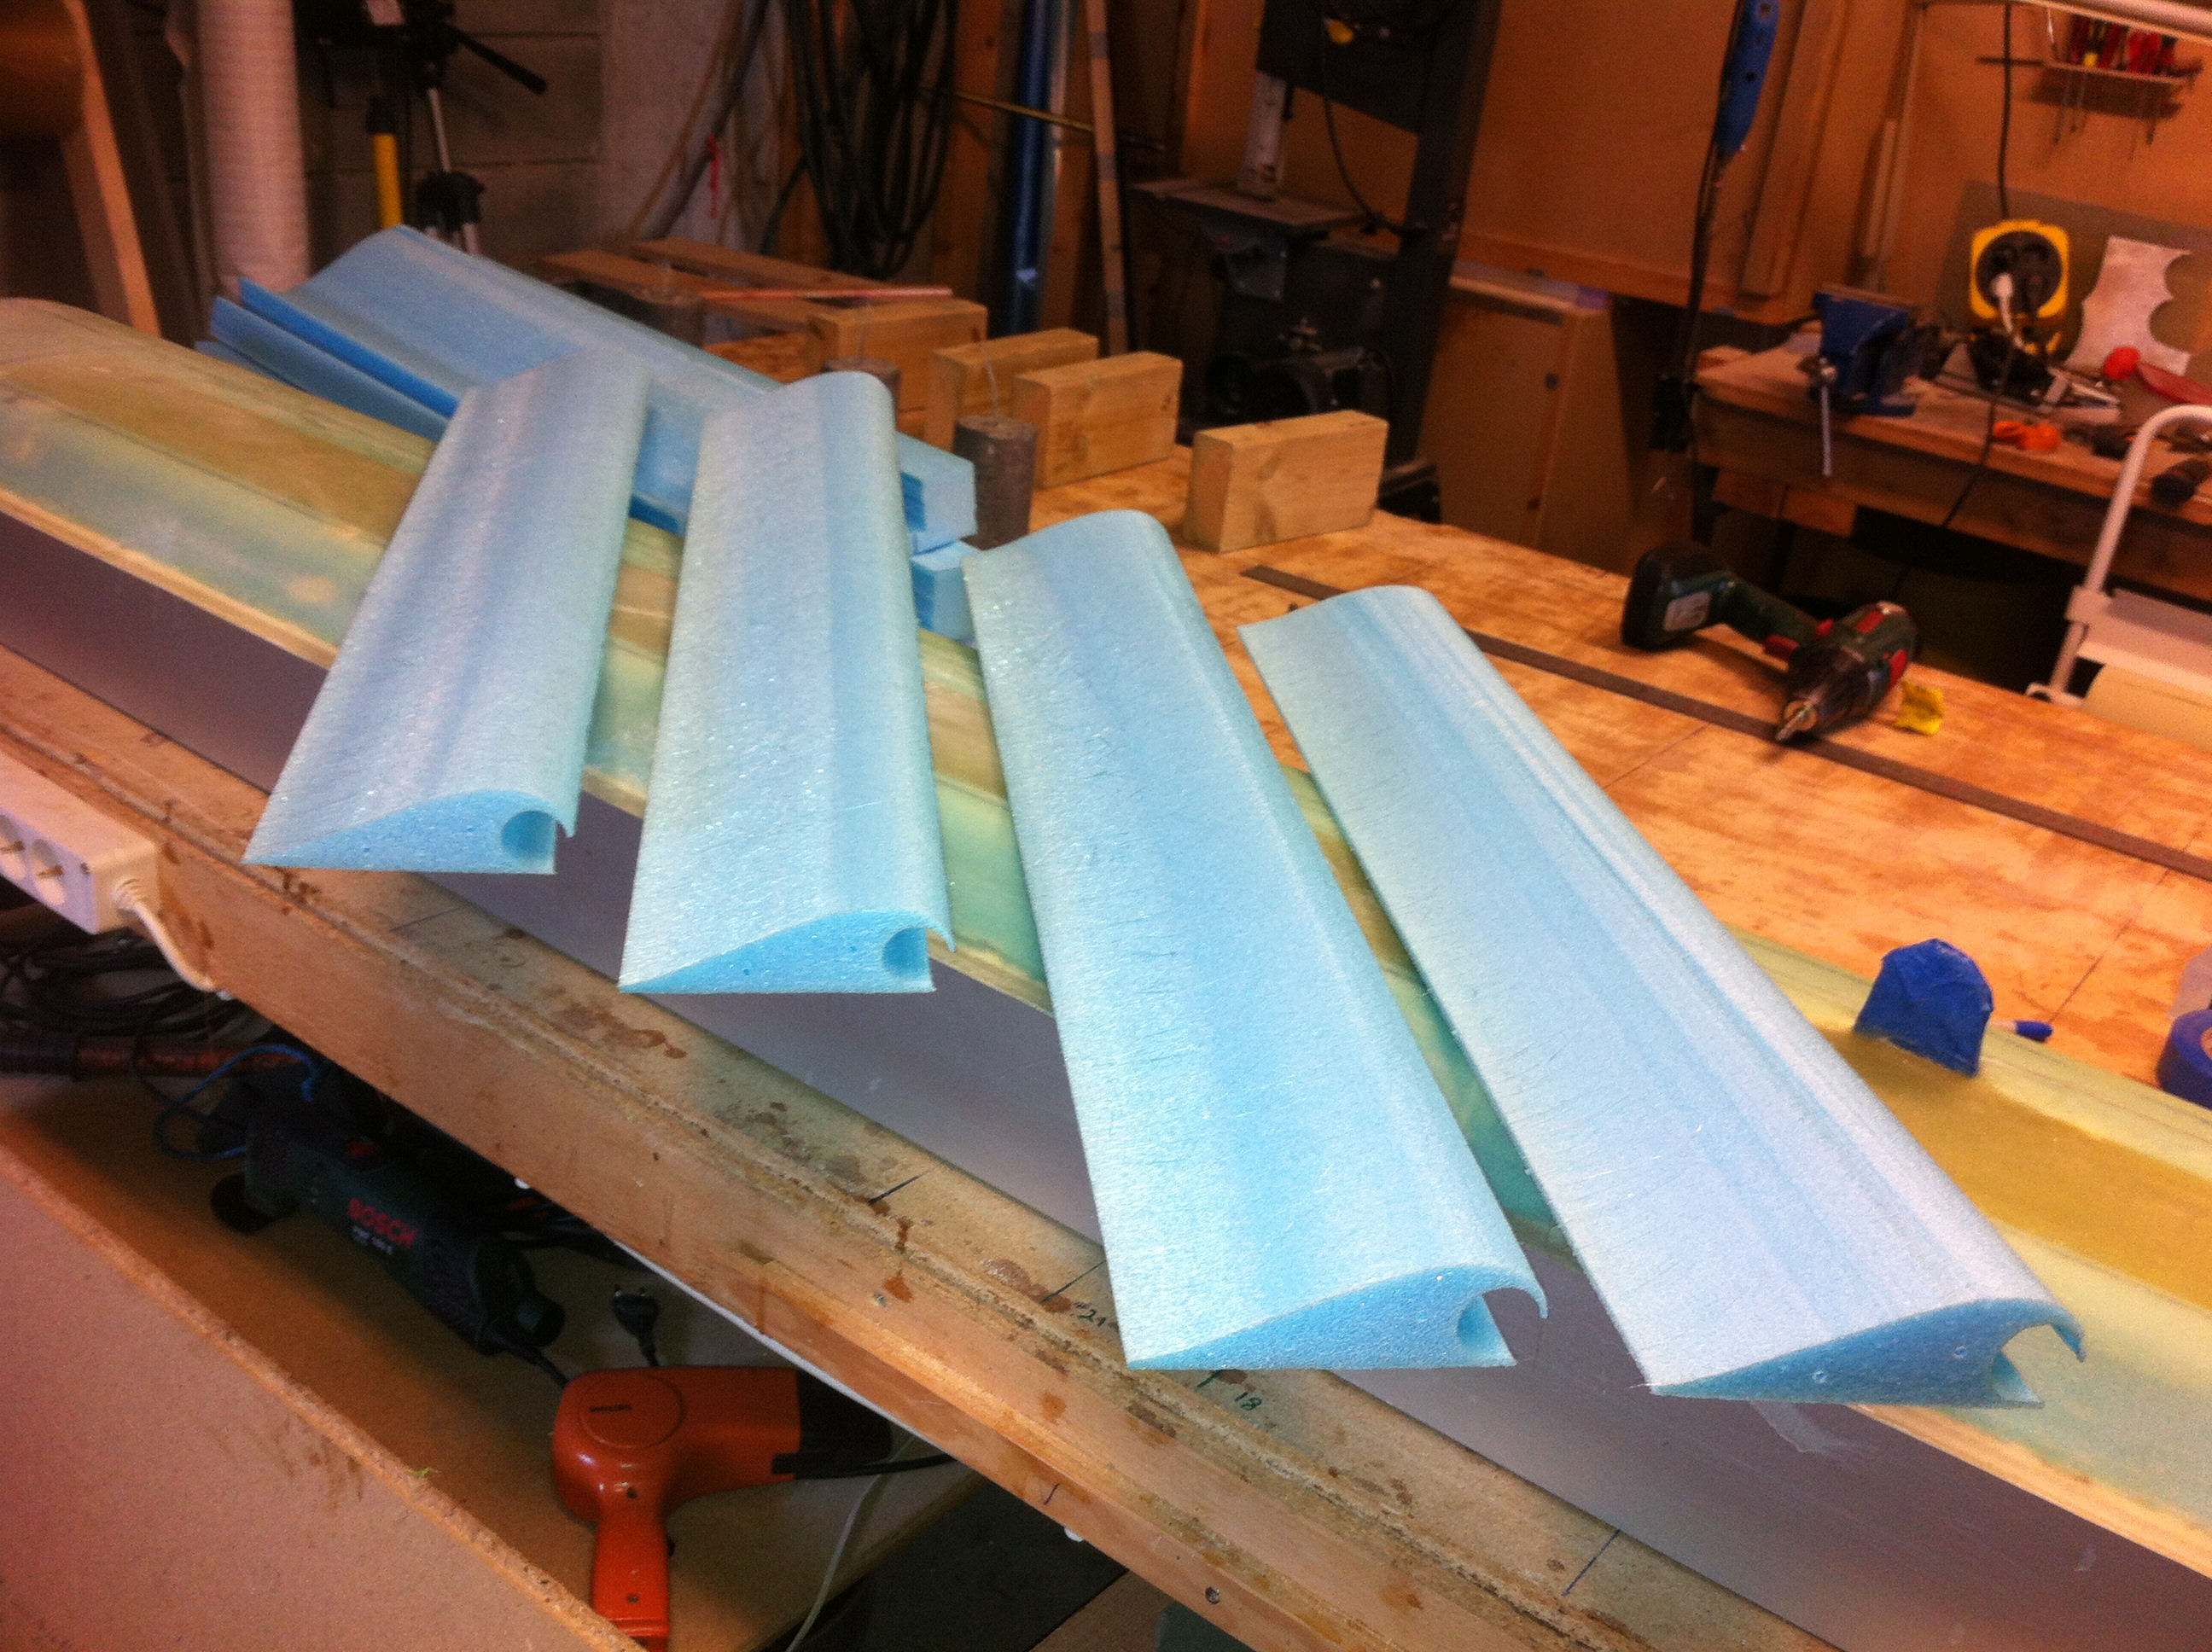
2012-08-03: My wife helped me once again and we cut the cores in no time (actually we used 45 minutes). Since I learn something from every step in this project I changed the hotwire-saw a bit so I could tighten the wire more easy between each cut we made. I also cleaned the wire thoroughly by sanding the wire with a fine sanding-paper between every cut as well. These to small steps made the cores very smooth and nice.
Now I have to wait for the parts from CG Products…
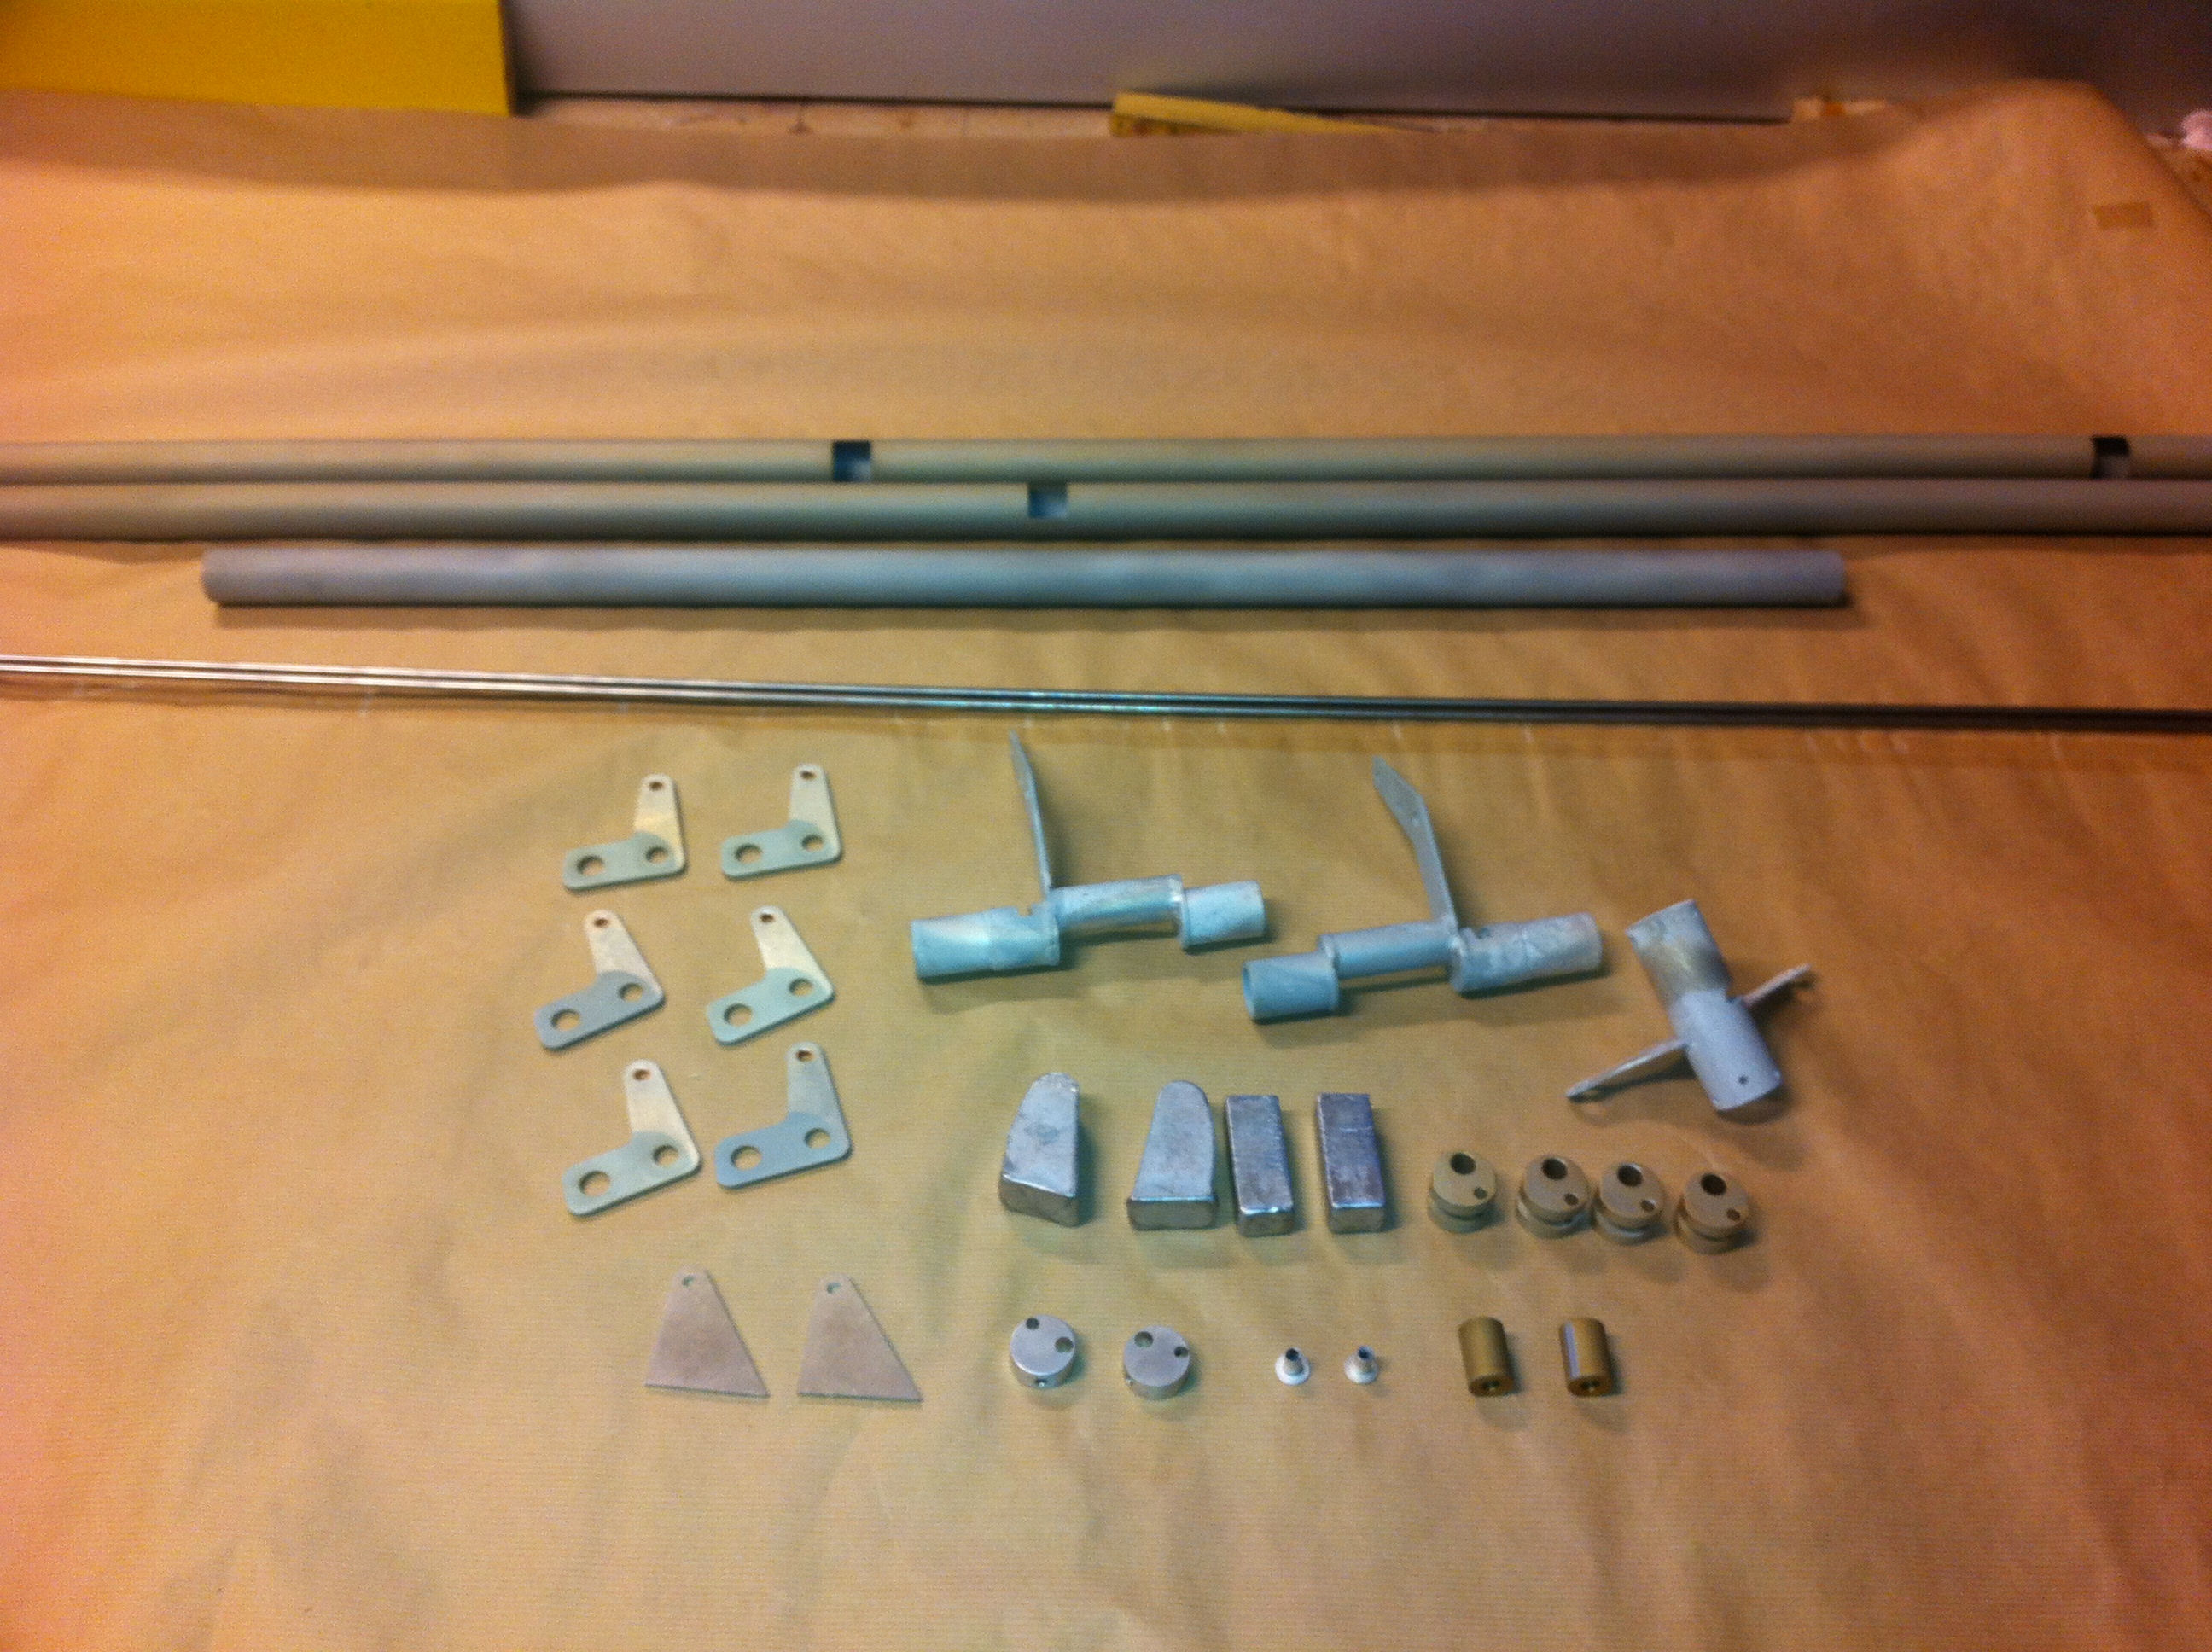
2012-09-29: Here are the parts I got from CG-products. Excellent quality as usual.

2012-09-29: To make the NC2 Hinge Insert fit in the already machined pockets in the torque-tubes I had to use my Dremel to open the pocket a bit more.

2012-09-29: I drilled a hole in the bottom and used a pop-rivet to fasten NC2 to the torque-tube.
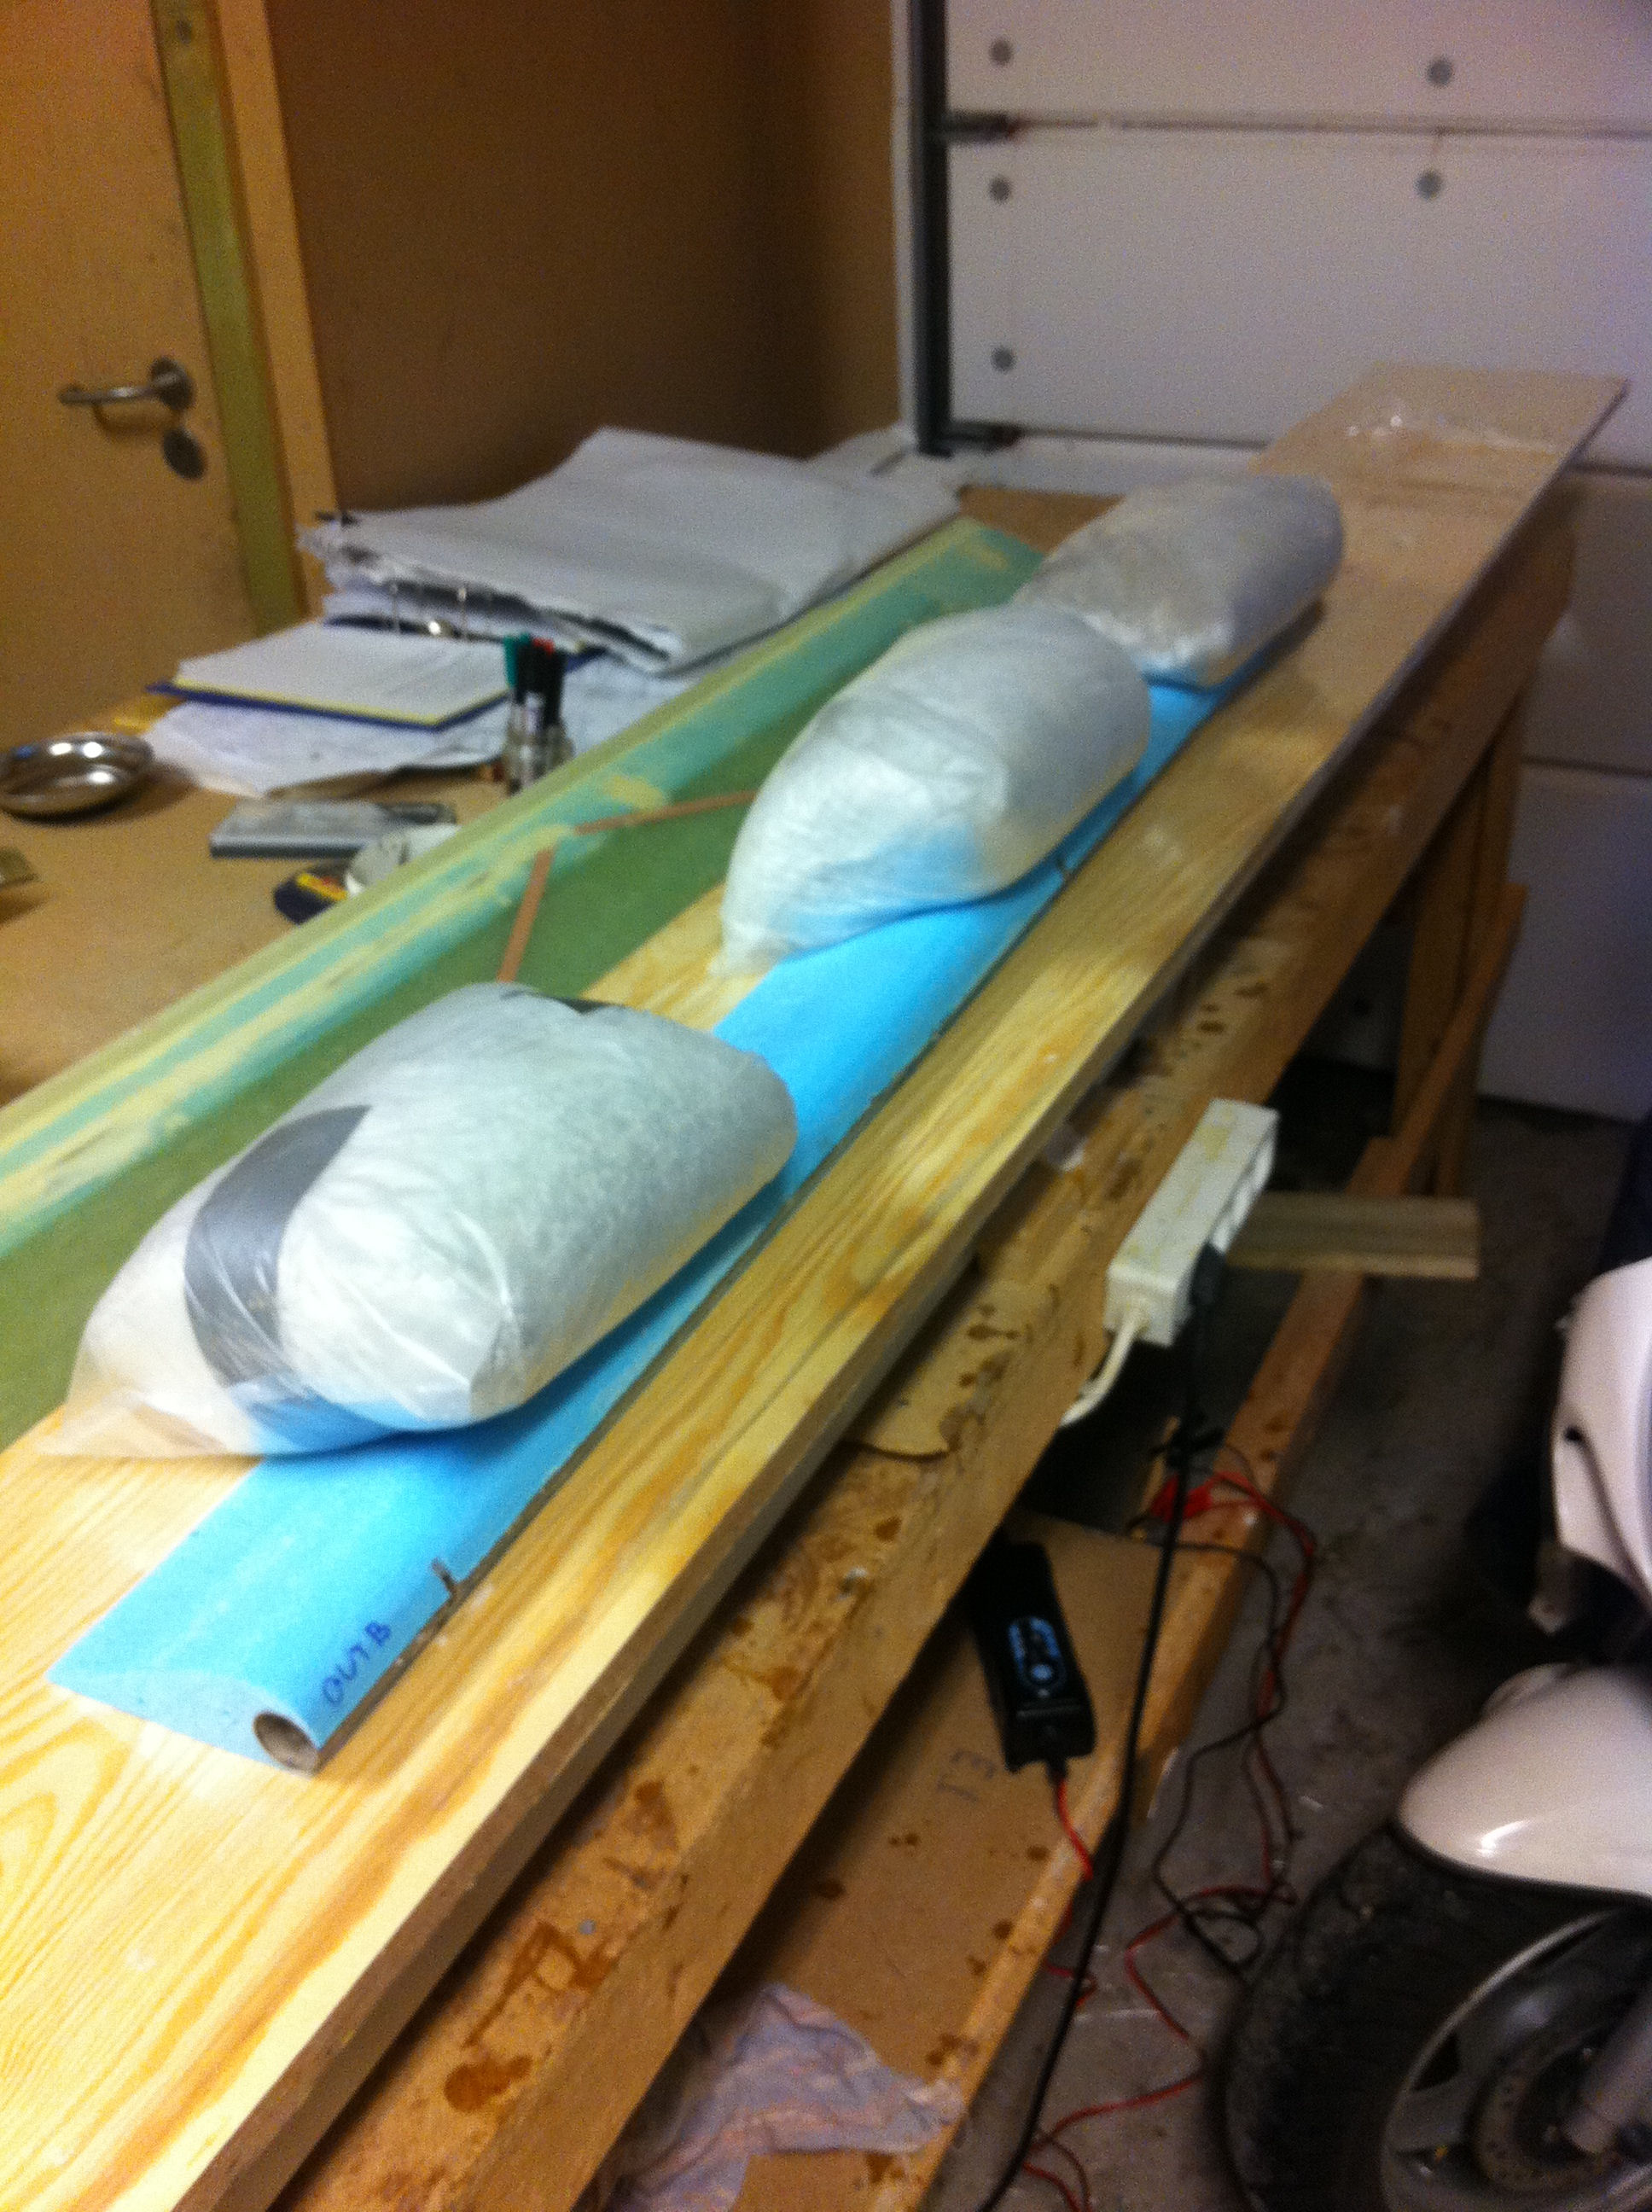
2012-09-29: Finally I trimmed of a couple of inches at the end of the canard cores to make them fit the length of the torque-tubes, microed the core-halves together and microed the torque-tube to the elevator-core.